
Deploy your first Agent
Complete the installation setup for local k3d, Kubernetes, or Amazon EKS. Continue in the same Bash shell at the root of the matching release checkout. Use the API connection, namespace and browser origin from setup.
Use this OpenShell workflow to evaluate Agent deployment and model execution. A successful run does not complete the remaining OpenShell production qualification.
Create an Agent called fred in the Console below, or start with the API. Both paths lead to the same onboarding steps. Choose a fresh setup where the name fred is available.
Create and deploy fred in the Console
Run deployment_preflight in your operator shell before creating the Agent. Open $CONSOLE_ORIGIN/console/ and sign in with the administrator account from setup. Keep any required browser port-forward running.
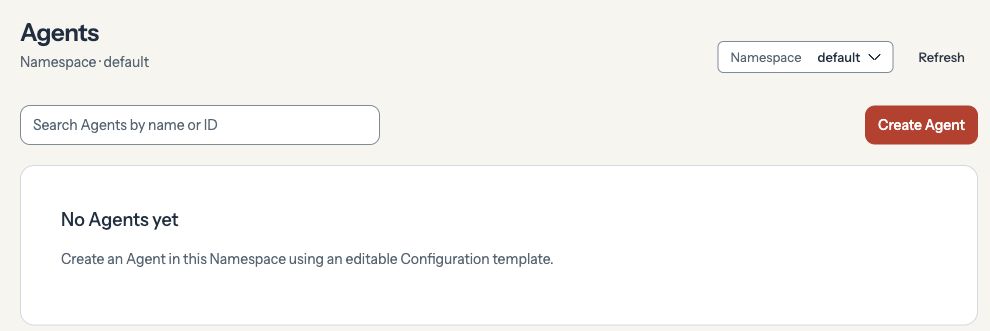
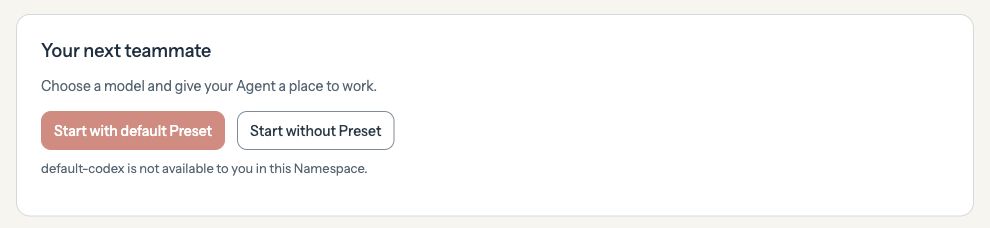
Open Agents, select the default Namespace, and click Create Agent. Choose Start without Preset.
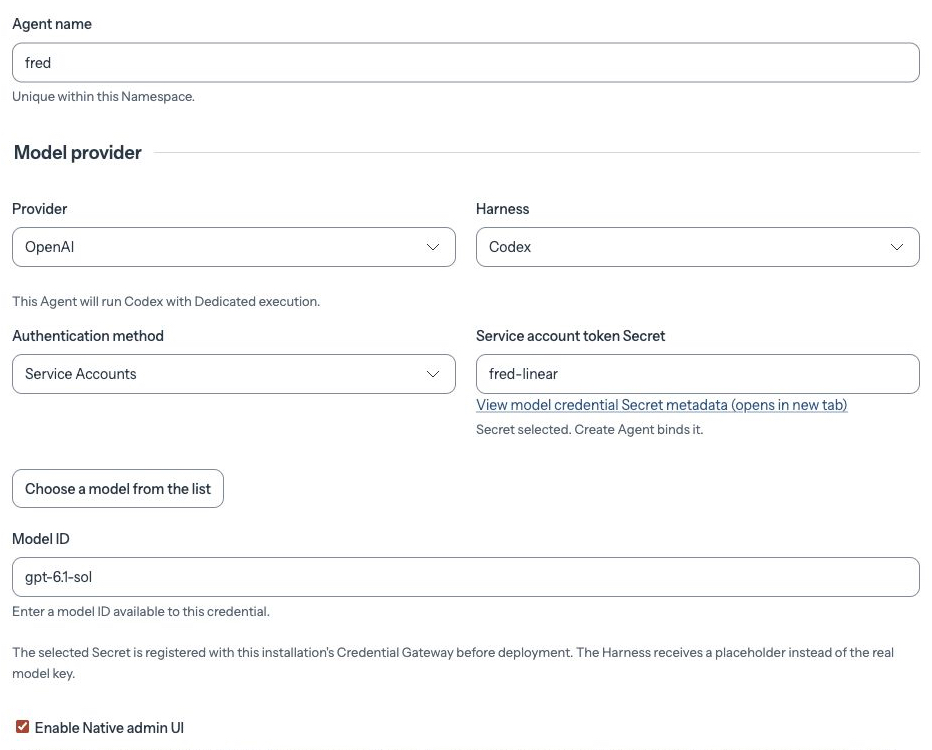
Enter fred for Agent name. Choose OpenAI as the provider and Codex as the harness. Under Authentication method, choose one:
- OpenAI API key — For chat, select the Secret that holds your API key.
- Service Accounts — For workspace plugins such as Linear, select a separate Secret that holds your ChatGPT workspace service account’s Codex access token. Get a service account access token.
To save a new credential, choose Create new Secret..., paste the key or token into Value, and click Create Secret.
Choose a Model your credential can access. If it’s missing from the list, click Enter model ID manually and enter its ID. Check Enable Native admin UI so you can open fred’s chat after deployment.
Click Create Agent once. OCE saves fred and starts its first deployment.
While provisioning runs, open Agents → fred in a second tab. Under Viewing version, select the first saved version. Copy the Agent ID after /agents/ and the deployment ID from revision= in that tab’s URL.
In the operator shell, enter those IDs to prepare the network rules and wait for that deployment. Record the Agent and its model credential for the Git and Linear walkthroughs.
agent='<Agent ID from the Console URL>'revision='<deployment ID from the same URL>'wait_deployment "$revision"request GET "$base/agents/$agent" > "$RUN_DIR/agent"name=$(jq -er .data.name "$RUN_DIR/agent")principal=$(jq -er .data.servicePrincipalId "$RUN_DIR/agent")modelSource=$(jq -er '.data.harnessAuth | select(.method=="credential_source") | .sourceId' "$RUN_DIR/agent")Continue to onboarding in the Control UI.
1. Select or register the model credential
Choose one credential for the dedicated Codex Agent. Both paths use the OpenShell Credential Gateway.
Before selecting either credential, confirm its account policy meets the OpenShell permission-profile requirement.
Option A. ChatGPT service account token
To use Codex plugins, choose a ChatGPT service account with the plugins you need enabled. For a new source, save its Codex access token in a private file outside the checkout.
source_type=codex-patsecret_field=access_tokencredential_file=/secure/oce/codex-tokenOption B. OpenAI API key
Warning: An Agent that uses an OpenAI API key cannot access Codex plugins, including Linear. Choose the service account token if you need plugins.
Use your OpenAI project’s API key. For a new source, save the key in a private file outside the checkout.
source_type=openaisecret_field=api_keycredential_file=/secure/oce/openai-api-keySelect or register the source
Set the Agent name and a unique prefix for the credential and role created by this run:
name=fredresource_prefix="$name-$(date +%s)"If the credential is already registered, set MODEL_SOURCE_NAME to its registered name. Select the ready source and continue to step 2:
modelSource=$(request GET "$base/credential-sources" | jq -er --arg n "${MODEL_SOURCE_NAME:?Set the registered source name}" --arg t "$source_type" \ '[.data[]|select(.name==$n and .type==$t and .state=="ready" and .ownerCapability=="credential_gateway")]|select(length==1)|first.id')Otherwise, store the credential in a Namespace Secret and register its reference before enabling the repository Credential Proxy. Set credential_file to the path of your owner-only file.
# POST $base/secrets: read the credential from its file.jq -n --arg name "$resource_prefix-model" --rawfile token "$credential_file" \ '{name:$name,value:($token|rtrimstr("\n"))}' | request POST "$base/secrets" --data-binary @- > "$RUN_DIR/model-secret" # POST $base/credential-sources: register the Secret reference for the selected login method.jq --arg name "$resource_prefix-model" --arg t "$source_type" --arg field "$secret_field" \ '{name:$name,type:$t,secrets:{($field):.data.ref}}' "$RUN_DIR/model-secret" | request POST "$base/credential-sources" --data-binary @- > "$RUN_DIR/model-source"modelSource=$(jq -er '.data|select(.state=="ready")|.id' "$RUN_DIR/model-source")2. Create the Configuration and Agent
Register the model with a fail-closed loopback URL. The Gateway uses authenticated WebSocket transport to the dedicated Codex Harness inside OpenShell.
Set MODEL to a Codex model ID available to your credential, without the codex/ prefix.
read -r -p "Codex model ID: " MODEL# Invoke with jq -n --arg model "$MODEL" -f codex-configuration.jq.{ kind: "agent", values: { gateway: { mode: "local", bind: "lan", auth: { password: {source: "env", provider: "default", id: "OPENCLAW_GATEWAY_PASSWORD"} } }, # Select the dedicated Codex runtime for this model. agents: { defaults: { model: ("codex/" + $model), models: {("codex/" + $model): {agentRuntime: {id: "codex"}}} } }, models: { providers: { codex: { api: "openai-responses", # Disable direct HTTP inference; the Gateway sends turns over the authenticated WebSocket. baseUrl: "http://127.0.0.1:9", models: [{id: $model, name: $model}] } } }, tools: {gatewayPolicy: {allow: [], actions: {}}, elevated: {enabled: false}}, plugins: { allow: ["codex"], entries: { codex: { enabled: true, config: { appServer: { mode: "guardian", transport: "websocket", url: "${APP_SERVER_URL}", authToken: "${APP_SERVER_TOKEN}", # OpenShell supplies the outer sandbox. Keep the human approval policy enabled. approvalPolicy: "on-request", approvalsReviewer: "user", sandbox: "danger-full-access" } } } } } }}# POST $base/configurations: save the model, sandbox and Gateway settings.jq -n --arg model "${MODEL:?Set an authorized model ID}" -f "$RUN_DIR/codex-configuration.jq" | request POST "$base/configurations" --data-binary @- > "$RUN_DIR/configuration" # POST $base/agents: bind the model source to one dedicated Agent.jq -n --arg name "$name" --arg cfg "$(jq -er .data.id "$RUN_DIR/configuration")" \ --arg m "$modelSource" '{ name:$name,configurationId:$cfg,executionMode:"dedicated",gatewayManagedMode:true, harnessAuth:{method:"credential_source",sourceId:$m},credentialSources:[{sourceId:$m}]}' | request POST "$base/agents" --data-binary @- > "$RUN_DIR/agent"agent=$(jq -er .data.id "$RUN_DIR/agent")principal=$(jq -er .data.servicePrincipalId "$RUN_DIR/agent")printf 'Agent: %s\nPrincipal: %s\n' "$agent" "$principal"Bind the origin before deployment
After creating the dedicated Agent, bind its exact browser origin to its new Configuration. Run these commands from the matching repository root. The hostname uses the same function as OCC. This example updates a new Configuration owned by this quickstart. For a shared or previously edited Configuration, follow the per-Agent edit procedure.
installation=$(request GET "/installation" | jq -er .data.id)origin=$(node --input-type=module - "$CONSOLE_ORIGIN" "$NATIVE_ADMIN_DOMAIN" "$RUN_DIR/agent" "$installation" <<'JS'import { readFileSync } from "node:fs";import { deriveNativeAdminHost } from "./apps/controller/src/gateway/native-admin-host.mjs";const [consoleOrigin, nativeAdminDomain, agentFile, installation] = process.argv.slice(2);const { data: agent } = JSON.parse(readFileSync(agentFile));const url = new URL(consoleOrigin);url.hostname = deriveNativeAdminHost(installation, agent, nativeAdminDomain);console.log(url.origin);JS)cfg=$(jq -er .data.id "$RUN_DIR/configuration")request GET "$base/configurations/$cfg" | jq -e --arg origin "$origin" '.data | select(.generation==1) | {expectedGeneration:.generation,values} | .values.gateway += {publicOrigin:$origin,controlUi:{enabled:true,allowedOrigins:[$origin]}} | .values.gateway.auth += {mode:"trusted-proxy", trustedProxy:{userHeader:"x-occ-identity",allowUsers:["occ-workspace-files"], deviceAutoApprove:{enabled:true,scopes:["operator.read","operator.write"]}}, identityScopes:{"occ-workspace-files":["operator.admin"]}}' | request PATCH "$base/configurations/$cfg" --data-binary @- > "$RUN_DIR/browser-configuration"3. Grant model access and deploy
Create one role scoped to credential sources. Bind that role to this Agent's principal for the model source only.
# POST $base/iam/roles: allow the operate action on CredentialSources.role=$(jq -n --arg name "$resource_prefix-sources" \ '{name:$name,permissions:[{action:"operate",resourceKind:"credential_source"}]}' | request POST "$base/iam/roles" --data-binary @- | jq -er .data.id) # POST $base/iam/access-bindings: grant access to one exact source.jq -n --arg p "$principal" --arg r "$role" --arg s "$modelSource" \ '{subjectKind:"identity",subjectId:$p,roleId:$r,resourceKind:"credential_source",resourceId:$s}' | request POST "$base/iam/access-bindings" --data-binary @- > "$RUN_DIR/model-binding" # Provision transport once, before the first revision.request POST "$base/agents/$agent/runtime-credentials" --data '{}' > "$RUN_DIR/transport" Console
Open $CONSOLE_ORIGIN/console/ and sign in with the administrator account from installation setup. Keep any required private browser port-forward running.
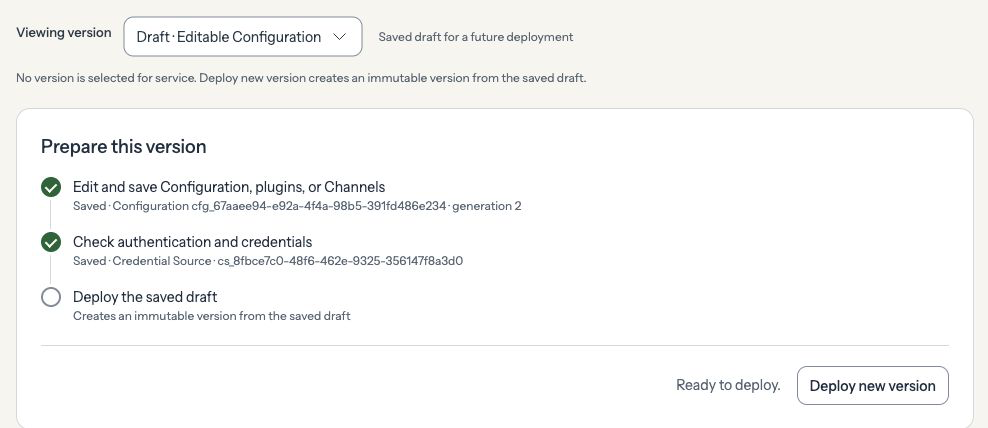
Run deployment_preflight in the operator shell. Open Agents → fred and select Draft · Editable Configuration under Viewing version. In Prepare this version, check the saved configuration and credentials, then click Deploy new version to start version 1.
Copy the deployment ID from the Console URL and wait for that deployment in the operator shell:
revision='<deployment ID from the Console URL revision parameter>'wait_deployment "$revision"CLI
Use the API helper defined above:
deploy_and_waitContinue when the deployment reports succeeded and the Agent's activeRevisionId matches the new revision. If the Console says the model is unavailable, see Recover from an unavailable model.
4. Complete onboarding in the Control UI
Control UI
Open Agents → fred, select the running version under Viewing version, and click Open Agent UI. The Agent's Control UI opens in a new tab.

In the Control UI, send this message:
Your name is fred. I prefer short answers. Please finish onboarding and save those details.
In the Console, open Workspace files on fred. Check IDENTITY.md for its name and USER.md for your preference.
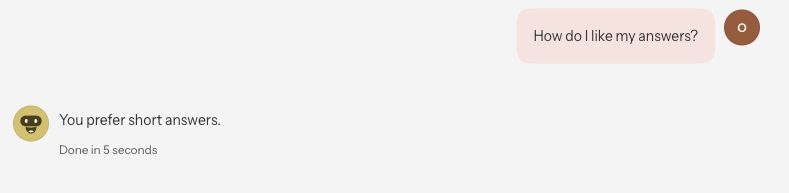
Send Reply with OCE_READY. and confirm the reply. Close the Agent tab, reopen Open Agent UI, and select the same conversation in chat history. Ask “How do I like my answers?” and check the reply against your saved preference. Retain the conversation's browser path with the private session record.
To hand off work, share the Namespace, Agent name, conversation label, and a link to the decision in your team’s repository at the exact commit. Keep launch tokens, redemption tokens, and browser cookies private. Your teammate signs in to the Console with their own account and opens the Agent. If they see the conversation in chat history, they can select it. Otherwise, they can start a new conversation with the decision reference.
CLI
To check that the deployed Agent can answer through its Gateway, run this in the same operator shell:
printf '%s\n' 'Reply with OCE_READY.' > "$RUN_DIR/setup-prompt"turn "$RUN_DIR/setup-prompt" > "$RUN_DIR/setup-result" &&jq -e '.outcome.status == "ok" and (.outcome.terminalReply.text | contains("OCE_READY"))' "$RUN_DIR/setup-result"A successful check prints true. Each turn starts a new conversation. Use the Control UI steps to complete onboarding and verify recall in the same conversation.
Resume the operator session
save_sessionRun the two commands printed by save_session to resume in a fresh Bash shell. The private session saves IDs and paths; the service key stays in its protected file. Keep this Agent running. You can add Git with either credential. To add plugins, use the service account token.
On Amazon EKS, verify workspace routing. To extend this Agent, continue to Git or Plugins.